To import profiles into the system, this data must be summarized in a tabular text file. The system can import different types of files, but these files should have a clean data structure and contain only the most urgent data.
Possible file formats are:
- XLS
- XLSX
- CSV
- HTML
To be able to perform a fast and reliable data import, we strongly recommend to import a simple CSV file -UTF-8 encoded. Import only fields and columns that are needed. Unused fields (columns) should be omitted, this reduces the file size and speeds up the import.
Important before the import
- Recommended data format: CSV
- uCharacter encoding: UTF-8 or ISO 8859-9
- Text separator: Semicolon
- Clean table structure without blank lines, special characters or formulas, no values or notes outside the table
- We recommend splitting large imports of 10,000 - 25,000 profiles per import
- Import only valid email addresses and only necessary data.
Important!
It is not possible to make changes in fields of the IP address type or in the Profile ID field.
Importing profiles from file
For a manual profile import, open the Profile folder in the left column and select the pool you want to import. Then click on the Import tab in the tab navigation.
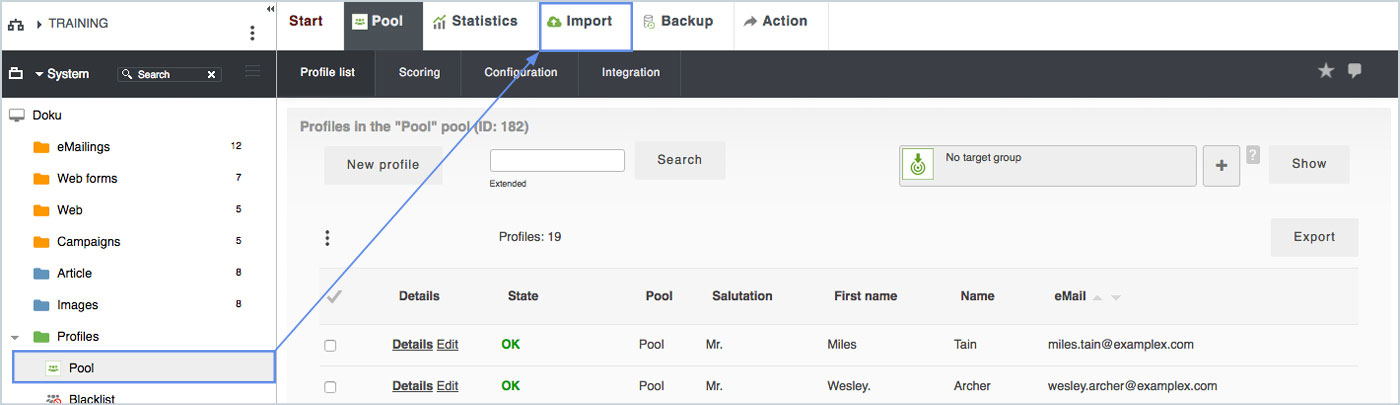
You make an import in the folder Profile/Pool under the tab Import.
An input mask appears in which you can name the import and select the corresponding file on your computer via the Source selection item. Then select the pool into which you want to import. Click on Next. You will be directed to the control view, where you can check whether the profiles to be imported - including special characters and umlauts such as "ä", "ö", "ü", "ß" - are displayed correctly. If this is not the case, change the file encoding and click Update.
If everything is displayed correctly and you click on Next, you will be directed to a page where the columns of the import file are compared to those in the pool. Here you can make additional settings for the import - e.g. what should happen if there are already profiles in the pool. All profiles that are imported into the system via an import are given the permission opt-out.
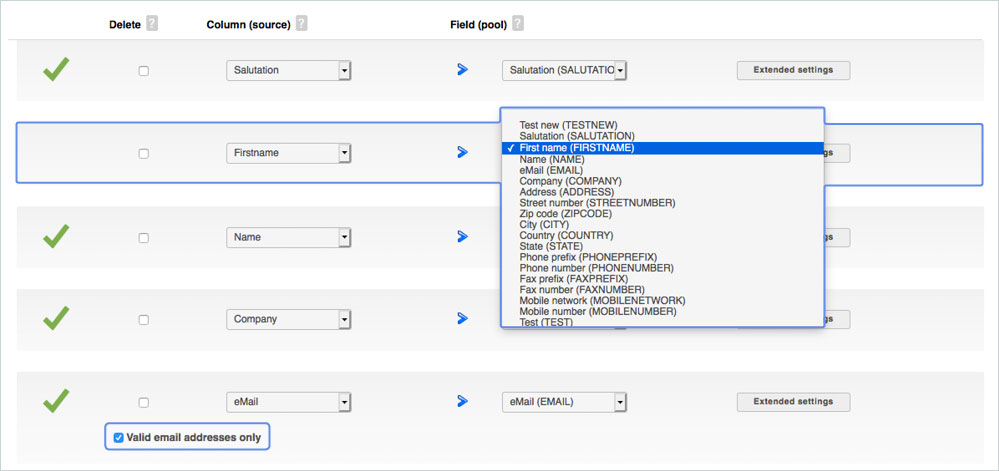
Assign table columns to pool fields
The system tries to assign the columns of the import file to the fields in the pool if possible. If it finds a match, you will see a green tick, otherwise a red cross. In this case select the correct pool field in the right drop down menu. The red X then becomes a green check mark. When all the hooks are green, click on Import in the lower right-hand corner and the import will start. After the successful import you will receive a confirmation by e-mail.
You can set the following here:
- Unique assignment of the profiles in the import file to the profiles in the pool (by e-mail).
- Duplicate check on the basis of: (e-mail).
- Delete column (do not import unnecessary columns)
- Assign columns (Column caption: Source -> Column caption: Pool)
- Advanced settings (add own value)
Assign fields (mapping)
Fields can also be mapped manually. If the import file has a different column caption than the column in the system, the columns can be mapped manually.
If the column caption does not match the field name in the pool, the column of the import file can be manually assigned to the field in the pool.
If there is a column in the import file that should not be imported, you can select it and click Delete to exclude this row from the import.
When all columns are correctly assigned, click on Import. After a successful import you will receive an email that the import has been completed successfully.
You can find more information about address import here.